Ghost搭建自己的博客平台

这里只是记录我的搭建过程, 只是给一些刚好有一台服务器的新手看的, 注意搭建环境一样要和我的一样, 否则这个内容没有参考价值!!!
Ghost的选择
我开始使用博客有三个阶段
- 流行博客平台:
CSDN,简书,掘金, - 自建静态网站: 通过
Github的 pages 服务,加上使用jekyll的静态博客. 优点:不需要自己有服务器, 缺点: 没有后台, 只能本地写markdown草稿,Git推送到Github, 不方便. - 目前的
Ghost: 优点: 博客后台, 可以极大自由的配置自己的博客主题.缺点: 需要有自己的服务器. 我采用的是Bandwagon, 当然也可以用Digital Ocean
曲折的过程
- 官方推荐的服务器系统是
ubuntu!!!! - 尝试了
CentOS发现坑有点多, 重装了几次服务器的系统都宣告失败, 最后一次是CentOS的Service 配置 (/lib/systemd/system), 所以果断放弃, 使用ubuntu - 结果是顺畅的无法想象!
安装
- Ghost 官方的引导 , 经常别人的博客搭建环境和你的不同,会造成各种问题出现. 所以还是推荐官方的配置环境
重要提示!!!! 先看下面的官网配置
Ubuntu 16.04 #只推荐这个服务器系统
MySQL # 数据库选型
NGINX (minimum of 1.9.5 for SSL)
Systemd
Node v6 installed via NodeSource
At least 1GB memory (swap can be used) # 最好是有1G 内存, 不够的话要用`Swap`实现
A non-root user for running ghost commands # 切记, 一定不用 `root`账号搭建, 且不要自己创建一个`ghost`账户
-
- 添加一个新的用户
adduser <user>添加新用户usermod -aG sudo <user>给用户赋予sudo权限su - <user>切换到该用户登录
-
- 软件包安装工具准备
sudo apt-get updatesudo apt-get upgrade
-
sudo apt-get install nginx安装nginx
sudo ufw allow 'Nginx Full'配置防火墙
-
sudo apt-get install mysql-server安装mysql
- 切记要设置一个
root账户, 并设置密码,牢记密码
-
curl -sL https://deb.nodesource.com/setup_6.x | sudo -E bash
sudo apt-get install -y nodejs安装node.jswhich node查看node命令行工具的安装路径, 一定要是/usr/bin/node 或者 /usr/local/bin/node- 不推荐使用
nvm来管理多个node版本
-
sudo npm i -g ghost-cli安装ghost命令行工具ghost help查看ghost帮助命令, 确认正确安装
-
sudo mkdir -p /var/www/ghost创建ghost的存储地址 -
sudo chown [user]:[user] /var/www/ghost- 这里
[user]就是指的 你上面👆创建的用户, 将[user]:[user]替换成manajay:manajay,这里manajay是我当时创建的用户
- 这里
-
sudo chmod 775 /var/www/ghost赋予ghost文件夹最高的权限 -
cd /var/www/ghost切换到ghost文件夹- 注意这里才是
ghost-cli执行命令的地方
- 注意这里才是
-
ghost install- 注意要在
/var/www/ghost这个目录下执行 - 过程中会让你设置各种参数
url访问地址, 一般是你的服务器域名
- 注意要在
-
install过程中会有错误, 处理方法: 如果有错误, 可以查看报错日志. 也可以使用ghost doctor检查问题所在. 一般的问题是因为①权限问题, ②缺少某个组件. -
实在安装不成功才执行的命令
ghost uninstall如果安装报错了, 就执行这个命令, 卸载, 重新ghost install安装
注意 修改配置文件的时候,一定要保留备份!!!!!!
CDN 优化
图片等资源 使用图床存储
七牛云图床
cd /path/to/your/ghost/installation切换到ghost的安装根目录npm install ghost-qn-store安装 七牛的插件sudo mkdir -p content/adapters/storage添加存储的路径cp -vR node_modules/ghost-qn-store content/adapters/storage/qn-store移动插件到正确的路径下sudo find ./ ! -path "./versions/*" -type f -exec chmod 664 {} \;创建路径后注意要更改权限sudo chown -R ghost:ghost ./content创建路径后注意要更改权限- 修改配置文件 ghost 根目录下的 config 文件,注意 config 的环境,
注意 ghost 版本>= 1.0.0
"storage": {
    "active": "qn-store",
    "qn-store": {
      "provider": "qiniu",
      "bucket": "存储空间的名称",
      "accessKey": "用户的访问 key",
      "secretKey": " 用户的秘钥",
      "origin": "http://p3q1ykanf.bkt.clouddn.com",
      "fileKey": {
        "safeString": true,
        "prefix": "YYYYMM/"
      }
    }
  }
具体的参数可以参考我这篇文章 MWeb 配置 七牛云 图床

提醒: 七牛图床虽然支持
https但是需要自建二级域名, 并且在公安备案, 你懂得!
github自建仓库存储图片
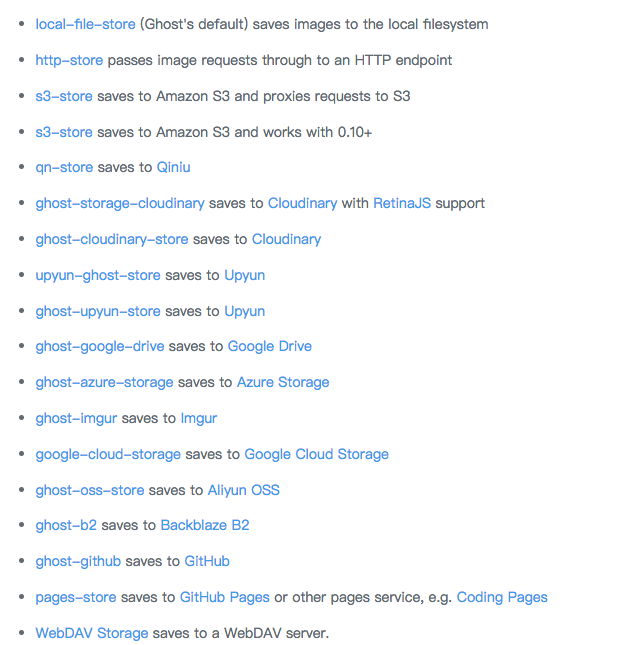
- ghost-github
cd /path/to/your/ghost/installation切换到ghost的安装根目录npm install ghost-github安装插件sudo mkdir -p content/storage创建插件存储路径cp -r node_modules/ghost-github content/storage/ghost-github转移插件模块sudo find ./ ! -path "./versions/*" -type f -exec chmod 664 {} \;创建路径后注意要更改权限sudo chown -R ghost:ghost ./content创建路径后注意要更改权限- 配置
config.production.json,注意 ghost 版本>= 1.0.0
"ghost-github": {
        "type": "",
        "user": "",
        "password": "",
        "token": "",
        "repo": "todayios-images",
        "branch": "todayios",
        "baseUrl": "https://cdn.todayios.com"
Using a custom storage module - 官方
全站支持 https 访问
使用Let's Encrypt生成免费的SSL证书
ssh远程登录服务器后台 最好用工具secureCRT- 使用 lets-encrypt的certbot工具
head -n 1 /etc/issue查看操作系统版本 , 具体安装命令需要根据系统版本执行, 所有还是直接看官网吧
这里我只说下我的Ubuntu + Nginx
首先升级包管理工具apt-get, 然后安装certbot
$ sudo apt-get update
$ sudo apt-get install software-properties-common
$ sudo add-apt-repository ppa:certbot/certbot
$ sudo apt-get update
$ sudo apt-get install python-certbot-nginx
- 一键生成命令
sudo certbot --nginx - 如果想手动修改
Nginx配置 ,执行子命令sudo certbot --nginx certonly - 注意 证书有个有效期, 所以要使用命令自动更新证书
sudo certbot renew --dry-run
注意 不要使用 certbot 重复生成证书, 因为每个账号在一定期限内都有证书限制, 如果你生成的证书过多, 就会警告⚠️rate limits. 那时候你只能等一周以后, 证书失效后,再去申请了.
绿色安全锁
绿色安全锁是网站安全及加密的标签,意味着来自和发往该网站的数据是加密的。证书提供商(Certificate Authority, CA)提供的证书用来建立加密
心酸历程 测试了很久的 https 安全锁, 一直没有出现, 最后用
Chrome的调试模式发现, 是页面里访问的图片 url 为http导致的
The page at 'https://todayios.com/ghost/#/editor/5b2118cfc2ccef5043a0ce5b' was loaded over HTTPS, but requested an insecure image 'http://p3q1ykanf.bkt.clouddn.com/201806/faviconde-fu-ben.png'. This content should also be served over HTTPS.
- 七牛云的图床虽然支持
https,但是只能自建图片的域名, 重点是 绑定的二级域名必须要公安备案!!!! ,太麻烦!!! 暂时没有更换图片的链接地址.
测试网站访问速度
Ghost 升级
- 使用非
ghost,root用户登录 ghost doctor检查ghost update --v1先升级中间版本ghost update 2.0.0升级最新的大版本
升级时小问题
在升级到 ghost 2.23.4 时 发现 ghost-cli 不支持, 同时需要升级 node 版本, 想到用 nvm 管理多版本的 node , 错误的把 nvm 安装到了 root 用户下, 遗忘了 Linux 系统的多用户权限问题 而升级 ghost 时 只能使用 非 ghost, root , 而 rvm 安装时权限不能在 该 ghost 部署用户下 操作.
解决方案: 本想 给一个组 中赋予 一个 nvm 的权限, 但是遇到了 Ubuntu 的包损坏, 不太好解决 , 暂时先将 nvm 卸载, 然后在 ghost 部署用户下 安装 nvm , 然后再安装新版本的 node 10.13.0 ,并 配置为默认的 node 版本.
npm install -g ghost-cli@latest安装最新的ghost-clighost doctor检查环境配置ghost update升级ghost start启动 o(╥﹏╥)o 又遇到问题了
manajay@ubuntu:/var/www/ghost$ ghost start
+ sudo systemctl is-active ghost_todayios-com
+ sudo systemctl reset-failed ghost_todayios-com
✔ Ensuring user is not logged in as ghost user
✔ Checking if logged in user is directory owner
✔ Checking current folder permissions
+ sudo systemctl is-active ghost_todayios-com
✔ Validating config
✔ Checking folder permissions
✔ Checking file permissions
✔ Checking content folder ownership
✔ Checking memory availability
A SystemError occurred.

Message: Systemd process manager has not been set up or is corrupted.
Help: Run ghost setup systemd and try again.

Debug Information:
    OS: Ubuntu, v16.04
    Node Version: v10.13.0
    Ghost-CLI Version: 1.11.0
    Environment: production
    Command: 'ghost start'

Try running ghost doctor to check your system for known issues.

You can always refer to https://docs.ghost.org/api/ghost-cli/ for troubleshooting.
执行 sudo journalctl -u ghost_todayios-com -n 50 查看启动错误日志, ghost_todayios-com 为我的 ghost 服务配置文件, 在 /var/www/ghost/files/ 目录下, 后面会被软链接到 /lib/systemd/system/ghost_todayios-com.service, 暂时不用关心.
日志显示
Jun 13 23:03:27 ubuntu systemd[1]: Started Ghost systemd service for blog: todayios-com.
Jun 13 23:03:27 ubuntu systemd[1]: ghost_todayios-com.service: Main process exited, code=exited, status=1/FAILURE
Jun 13 23:03:27 ubuntu systemd[1]: ghost_todayios-com.service: Unit entered failed state.
Jun 13 23:03:27 ubuntu systemd[1]: ghost_todayios-com.service: Failed with result 'exit-code'.
Jun 13 23:03:27 ubuntu systemd[1]: ghost_todayios-com.service: Service hold-off time over, scheduling restart.
Jun 13 23:03:27 ubuntu systemd[1]: Stopped Ghost systemd service for blog: todayios-com.
Jun 13 23:03:27 ubuntu systemd[1]: ghost_todayios-com.service: Start request repeated too quickly.
Jun 13 23:03:27 ubuntu systemd[1]: Failed to start Ghost systemd service for blog: todayios-com.
Jun 13 23:03:27 ubuntu systemd[1]: ghost_todayios-com.service: Unit entered failed state.
Jun 13 23:03:27 ubuntu systemd[1]: ghost_todayios-com.service: Failed with result 'start-limit-hit'.
Jun 13 23:08:25 ubuntu systemd[1]: Stopped Ghost systemd service for blog: todayios-com.
主要是两点 : Start request repeated too quickly , Failed with result 'start-limit-hit'
解决方式:
- 移除启动软链接
rm /lib/systemd/system/ghost_todayios-com.service - 重新配置软链接
ghost setup systemd然后检查ghost doctor没问题 - 重新启动
ghost startO(∩_∩)O哈哈~ 搞定 !
Discussion